Procedural Environments
The interesting parts of this project were creating the procedural floating structures and arranging them in a meaningful way. I still find myself looking to brute force an effect with VEX, and will often find a solution with nodes days later in some tutorial somewhere. I still have a lot of room to improve on lighting my scenes, but my current focus is getting through small projects as opposed to perfecting a single one.
Checkout a more detailed breakdown of the procedural construction of the floating geometry below!
Environment Breakdown
Here is a procedural space tunnel created by making small surface adjustments to two different “arms”, then copying those arms into a tunnel and bending the tunnel. Each arm has it’s own random movement which makes the scene feel a little more alive.
The arms were created with a similar workflow from Week 2 of the intro to FX Rebelway tutorials with modifications to add more details to the geometry and an animated final output.

The creation of the arms began with a COPS to SOPS workflow. This allowed us to use a shader to generate sci-fi like noise, and split these blocks into separate pieces. The motivation of this workflow was to get densely packed primitives that share edges.
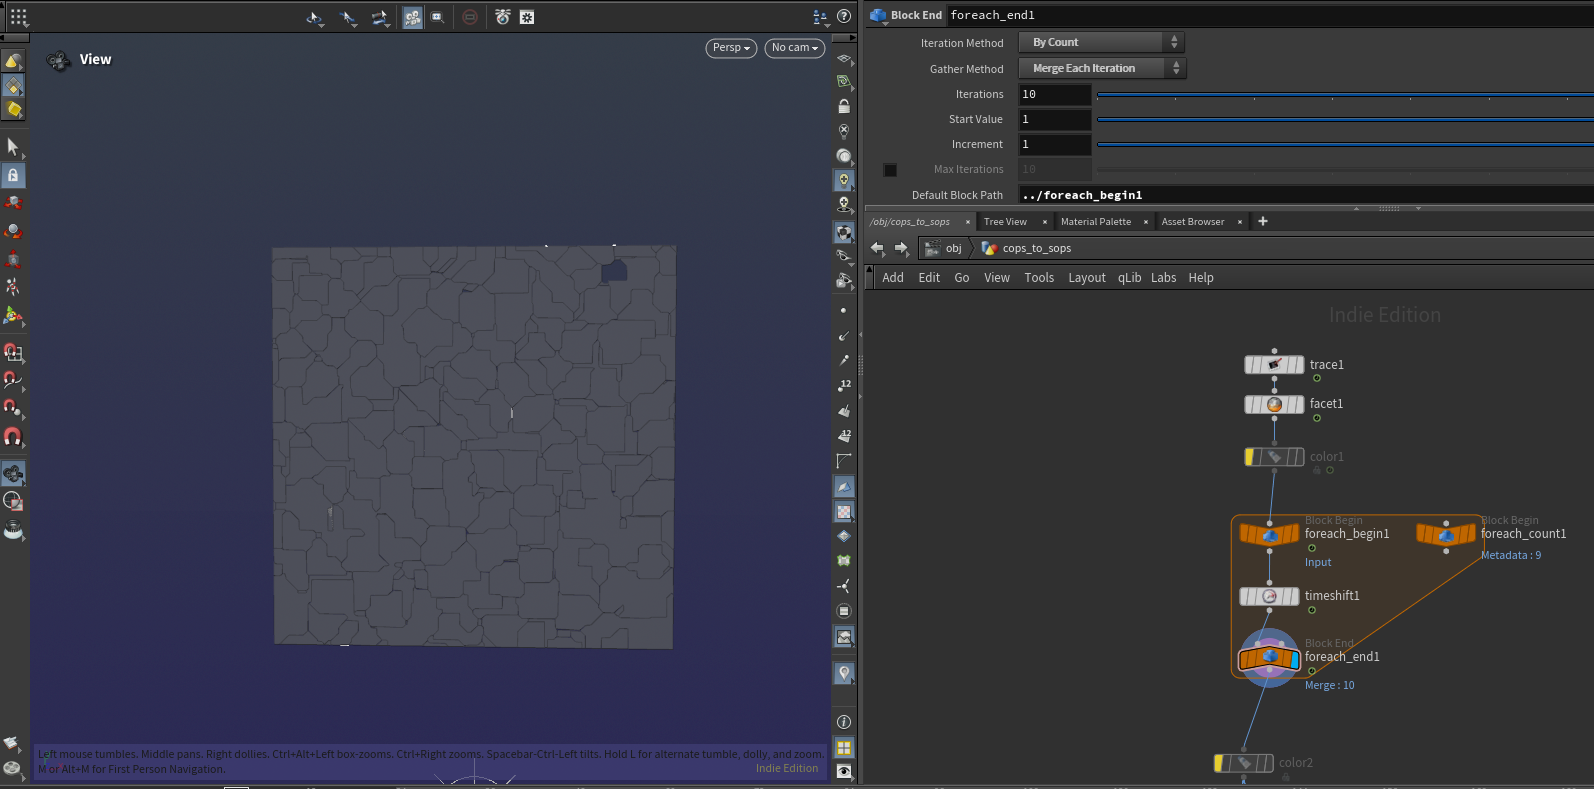
Once taken out of COPS, one solid piece of geometry could be created by looping over each of the cutouts from the shader. The cutouts occurred by converting the image to grayscale and shareholding different color ranges to separate each block. These blocks were then combined in the for loop.
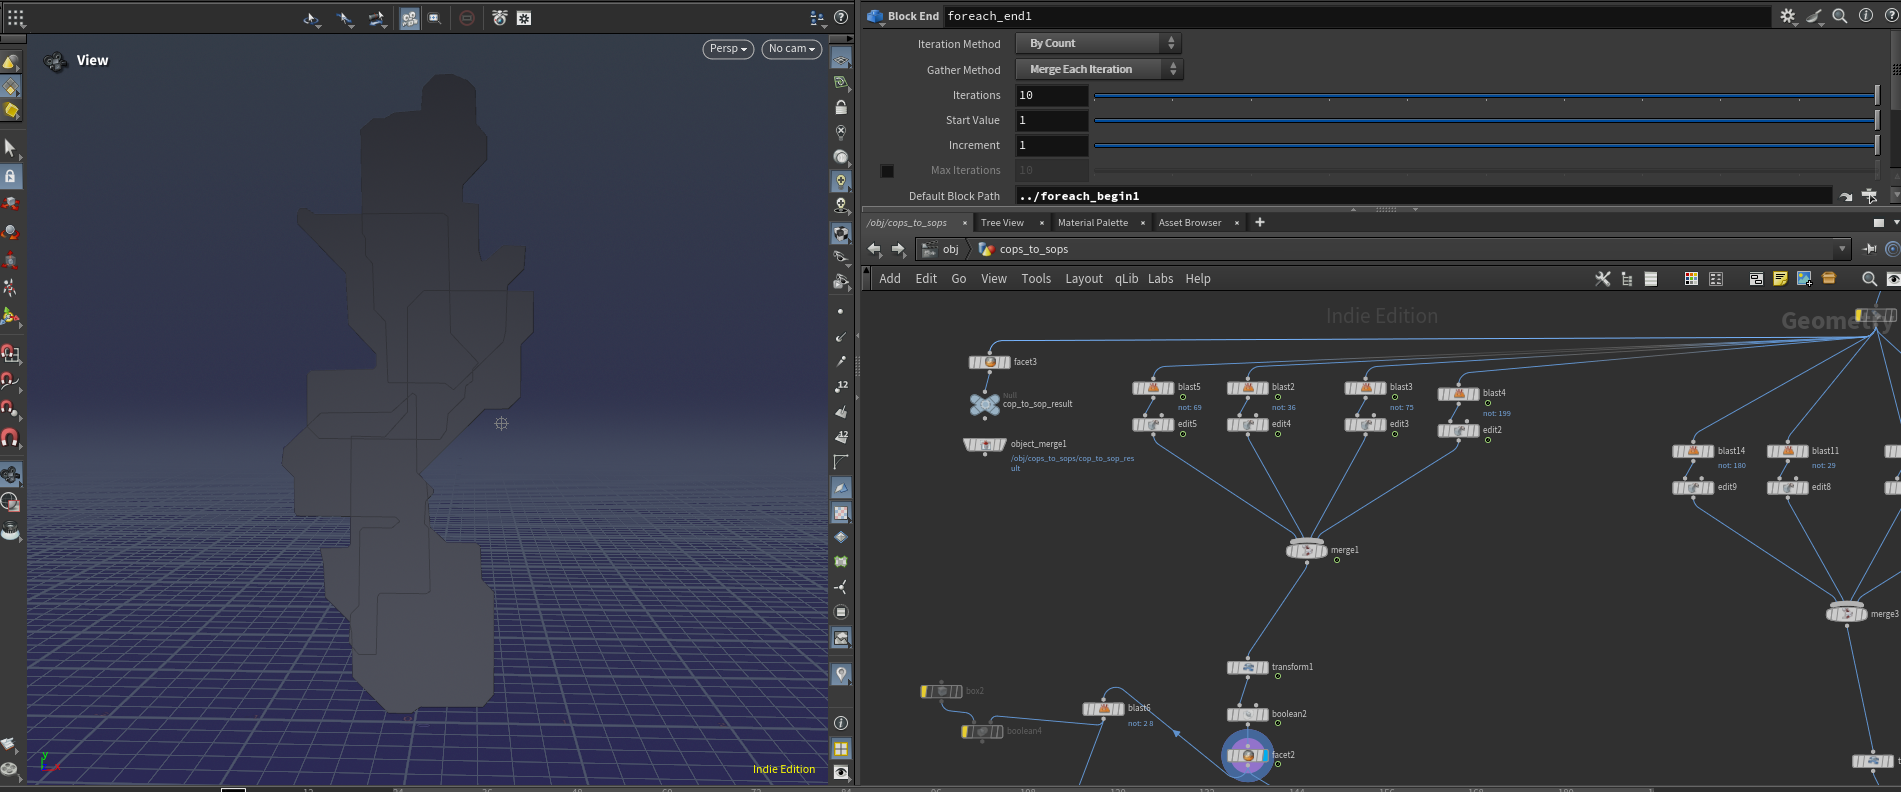
Some of those primitives were then isolated and transformed to create an interesting structure. Having some overlap in the structure was actually desired here as it created sections that could be further manipulated to add surface geometry.
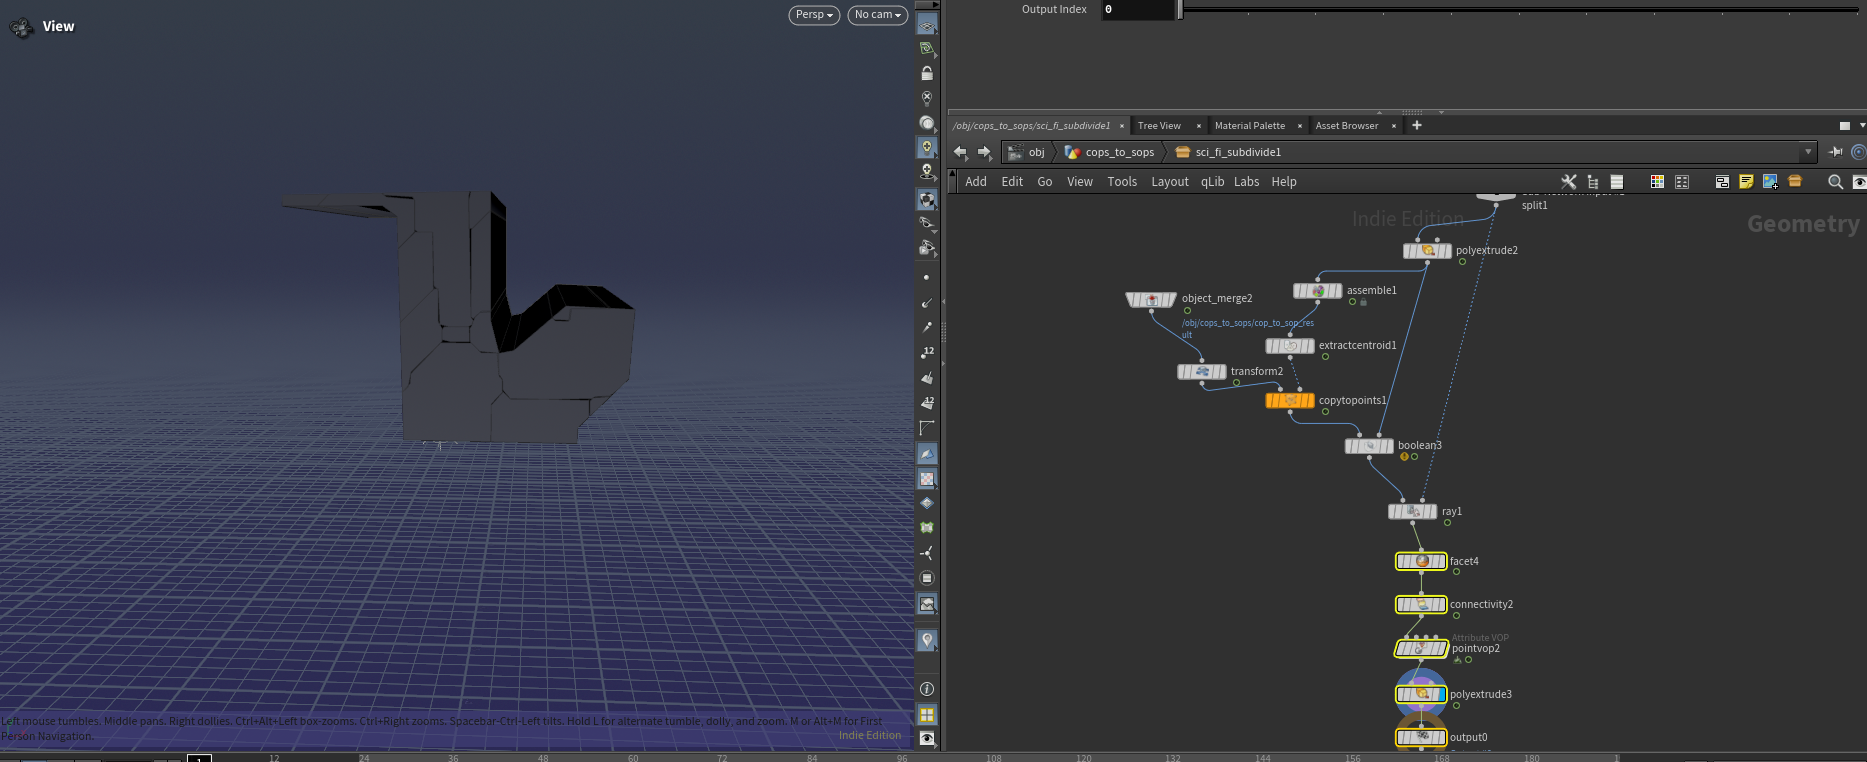
One of those sections from the larger block could be isolated, then overlaid with the geometry generated from the shader. After projecting the more detailed geometry onto the cutout, the smaller subsections could then be randomly transformed forward/back to add surface details.
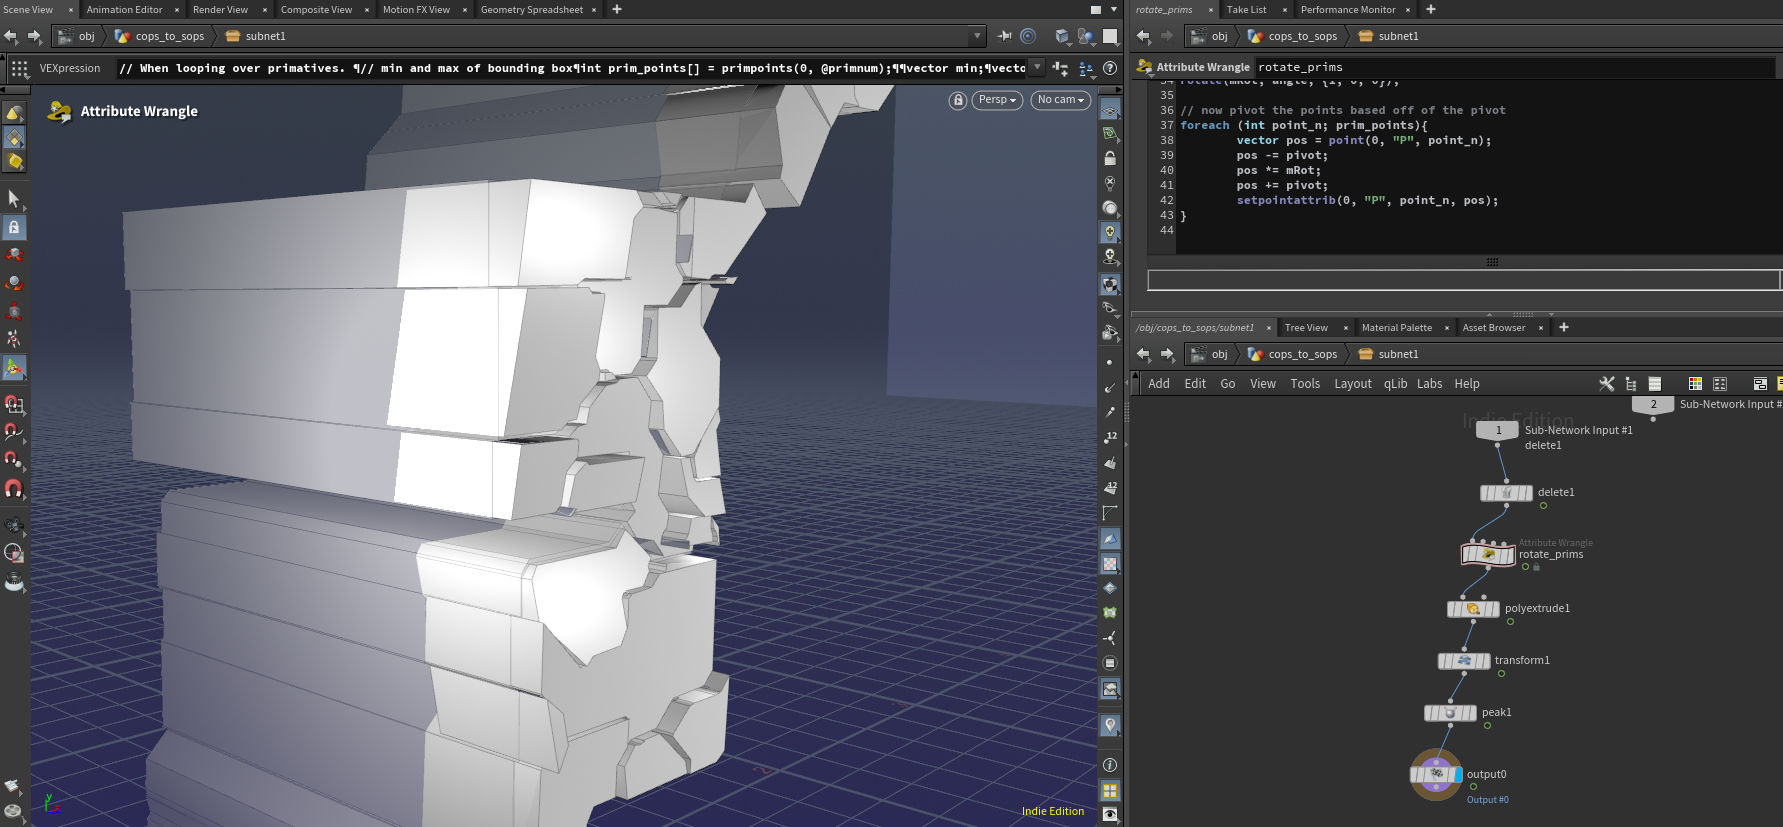
I attempted to take the procedural face details to the next level by also adjusting the tilt of each face. This occurred by rotating each face by either the top or bottom of the face then extruding the face back.
The idea was to create a more connected look between the segments, but randomly picking the top or bottom of the section didn’t quite achieve this look. It would have been better to try and transform individual points that were shared between primitives instead.
Another issue I had is that the resulting geometry refused to combine well with the arm. This always left a stark line at the intersection between the two.
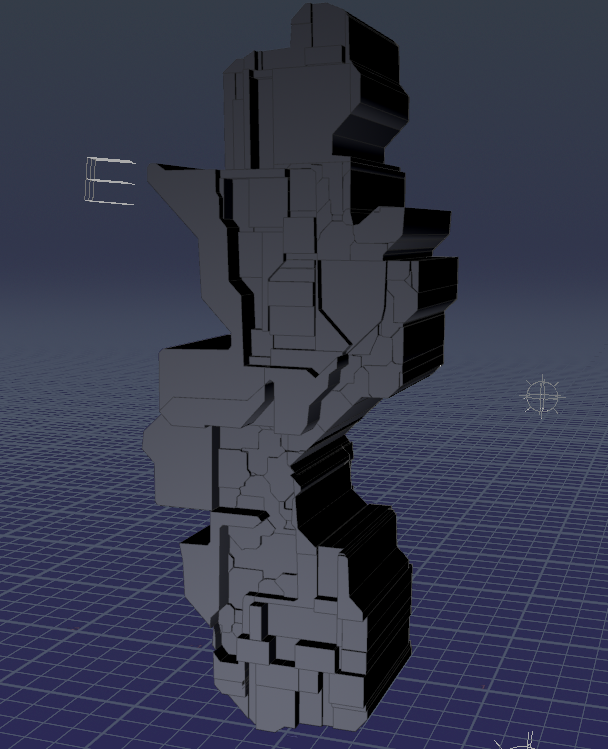
And this is what one of the arms would look like after the procedural face changes!
There’s even an extra system in place to create more square cutouts which you can see at the bottom of the arm.
The sides are quite bland though, so I tried to fix that below.
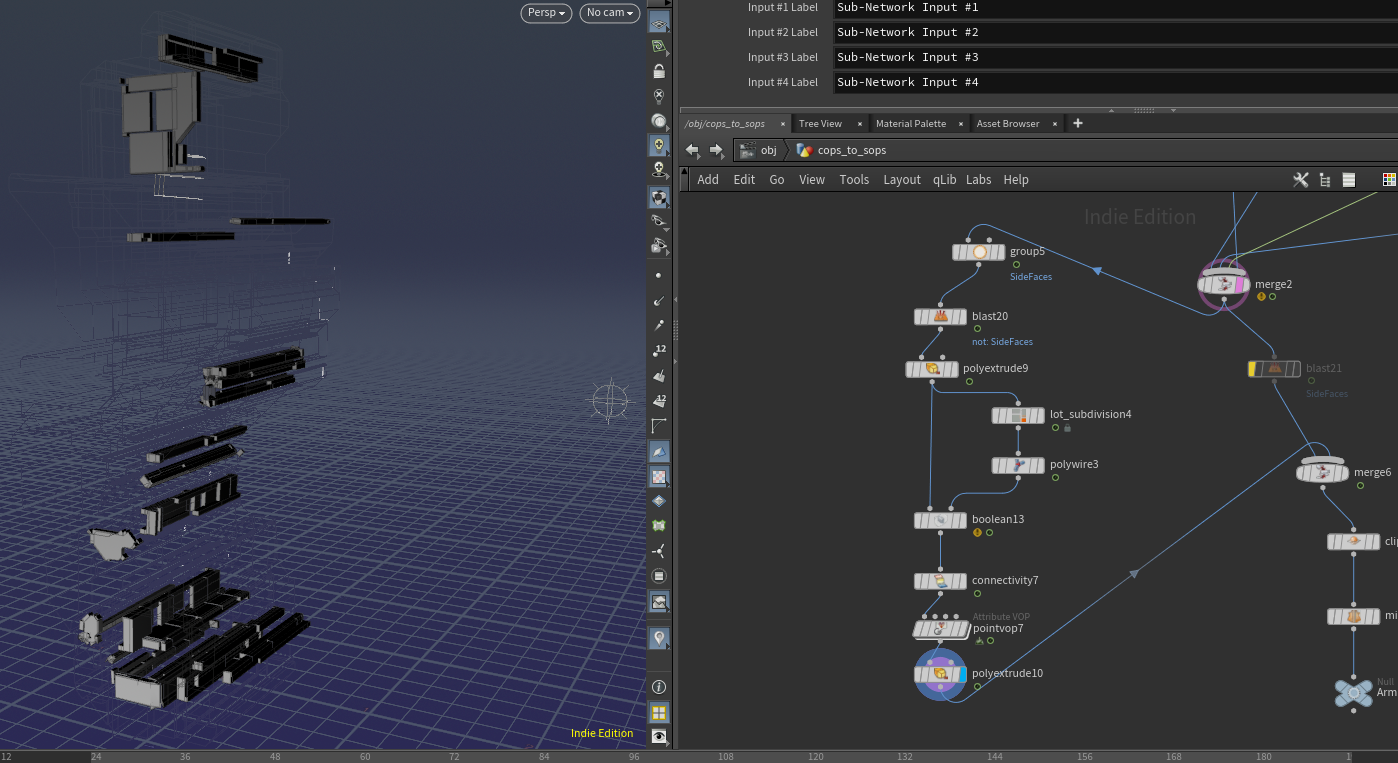
I selected a ton of the side faces, then tried to further subdivide those and extrude them to create some more surface detail on the edges, since the edges will certainly be seen in a tunnel.
It kind of worked out, but I had trouble finding a way to select just the edges on the inside since there are so many unique primitives in the scene.

Once two different arms were built, it was a simple process to copy, transform, and rotate them to form a tunnel. Combine that with a bend node to add a curve and some random offset on each arm, and you have the finished scene! Minus a few lights that is.
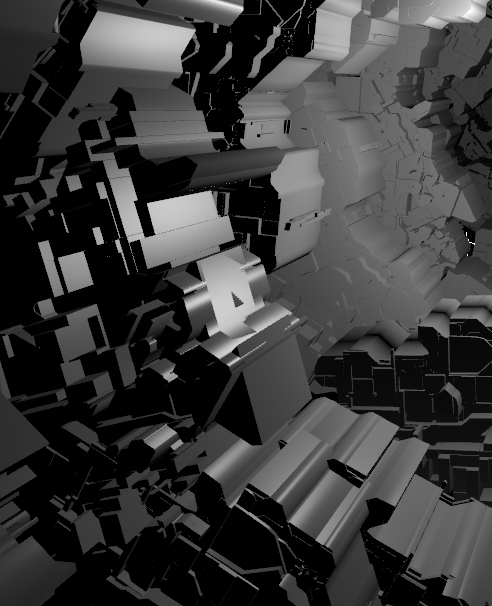
One of my biggest complaints with these scene is it felt like I was just hacking at polygons. There were so many cuts and it was a little difficult to keep track of what stayed together versus created entirely new geometry. Because of that there were a lot of overlaps that caused some major popping and rendering issues.
Working on keeping the geometry from intersecting too heavily would probably help with this issue, and just more practice in general with breaking up and adjusting geometry.